Video Coming Soon
Every proposal that you manually offer to a client is entered into Arborgold as a job in 'Proposal' status. There are multiple locations that can be used to create a job, but three of the most common are:
- from the Customer page, under the Action drop down, using the Add Job option
- from a Message, under the Action drop down, using the Add Job option
- from the Jobs page using the + Add Job button
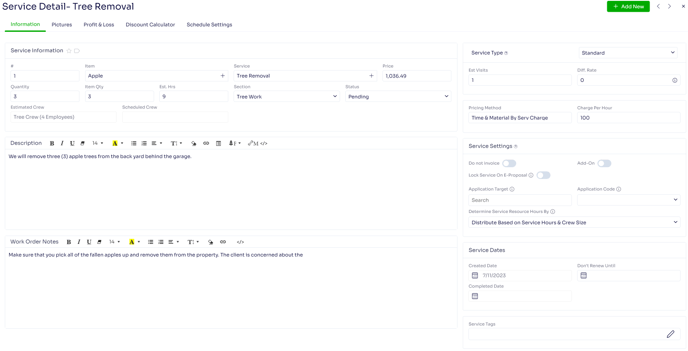
Any of these options will bring you to a blank Job Information page, where you can add and edit details on the job for both your, and your customers, benefit.
Job Information
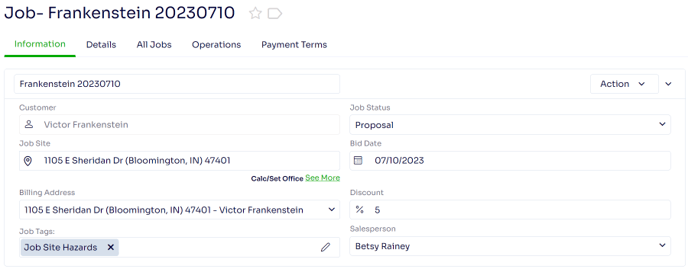
Job Name - is the unique job name that generates for each job based on the customer sort on (last name or company) and the bid date. Note: this can be changed, but it important to note that this should be done before any maps or images are added to the job as the job name is what connects those components to the job.
Customer - is the name of the customer that the job is attached to. This is not an editable field, and is set at the time of job creation (learn more about customer creation here.)
Job Site - is the job site associated with the job. If the customer has multiple job sites, you will be able to select the appropriate job site from the list (learn more about how to add an address to a customer account here.)
Billing Address - is the customer billing address. Generally speaking this will be the job site displayed on the main customer page (learn more about how to change a billing address here.)
Job Tags - is where you can attach job tags to the job. These are often used for job site hazard alerts, rental reminders, and status updates (learn more about this here.)
Job Status - is the stage in the job life cycle that the job is in. There are currently seven job statuses available: generated, proposal, declined, work order, completed, cancelled and hold (learn more about this here.) Note: as mentioned above, if you are manually creating a proposal for a client, it will always start off in 'Proposal' status.
Bid Date - is the date that the job was created in your database.
Discount - is where you can enter in a percentage that the job is to be discounted by (learn more about this here.) Note: the discount must be added in as a whole number; an example of this would be if I wanted to add in a 5% discount, I would type in 5, not .05.
Salesperson - is where you would enter in the name of the salesperson associated with the creation of the job.
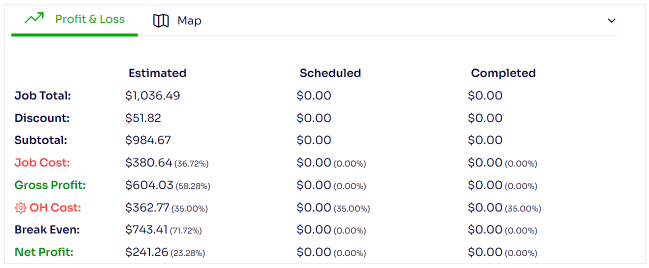
$ Profit & Loss Chart (learn more about this here.)
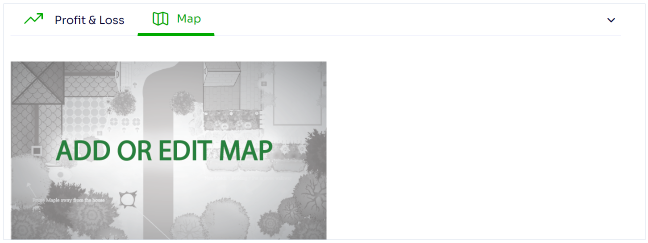
Map (learn more about this here.)
Details (learn more about this here.)
![]()
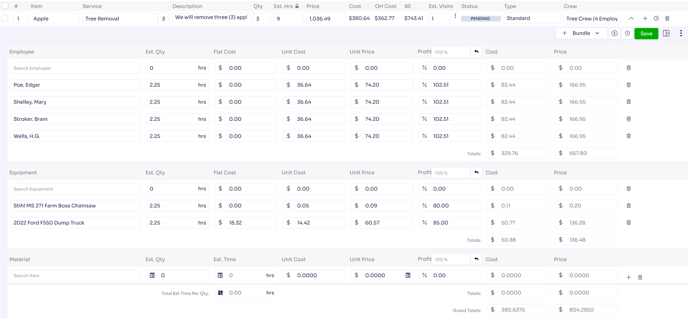
Service Line Items
Once the job itself has been set up, we can now turn our attention to the services that we are offering the client. These are added to the job as service line items
Note: as the columns you see on the page are customizable, we will focus on only the defaults for now, however you can decide what columns you see by clicking on the tile icon to the right above the service line items.

# - is the number that denotes the order in which the services are meant to print on the proposal. This not only allows you to dictate what order you would like the services to display in, but allows you to rearrange them as needed without having to remove and re-enter services. You only need to change the number under the '#' column next to each service, click the Save button, and they will rearrange themselves.
Item - is the plant or item that the service is being performed on. Note: this is different than a material item, which is entered as a resource on the service. When thinking about the differences, consider that an item is what you are preforming the service on, and a material is used to preform the service.
Service - this is the name of the service being offered to the client (learn more about this here.)
Description - are notes that will display on the proposal, the work order, and the invoice (unless this has been removed as per your request during the customization process) that pertain to the individual service.
Qty - is the quantity of item or of service for the service being offered to the client. Note: what option you use for the quantity depends on what you would like to display to your customer, and how you have set up your service. Both options are perfectly valid.
Est Hrs - are the estimated man hours on the service entered, usually, by the salesperson.
Act Hrs - are the actual man hours spent on the service by the crew.
Sch Hrs - are the scheduled man hours associated with the service after scheduling
Price - is the price of the service.
Cost - is the resource cost of the service.
OH Cost - is the overhead cost of the service.
BE - is the break even (overhead cost + cost) of the service.
Est Visits - is the number of visits estimated for this service based on the estimated hours and the number of employees on the crew (unless a recurring service is set up with a default number of estimated visits).
Status - is the status of the service (learn more about this here.)
Type - is the type of scheduling method that this service will utilize (learn more about this here)
Crew - is the name of the crew that has been assigned to the service for job costing and future scheduling purposes entered either by the salesperson or the service's default crew.
Resources On The Service (learn more about this here.)
Service Details (learn more about this here.)
Edited by Betsy Rainey 07/11/2023