How to schedule and bill a multi-day tree removal. How to use the recurring screen for a multi-day service
For this example, we did a tree removal. You want to make sure the estimated hours is filled out for the total number of man hours the service will take, in this example we put in 60 estimated hours for a large tree removal.

Be sure to set the service type as recurring on the job.
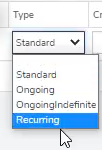
To get to the scheduling aspect of the service, click the blue recurring text.

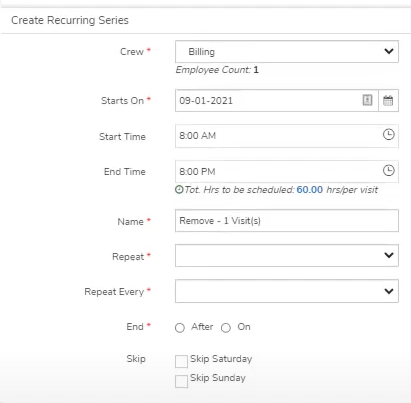
The following information can be filled out when creating a recurring pattern:
-
Crew: your scheduled crew
-
Starts On: the day you first plan to start work on that job on that service
-
Start Time: the start time for your crew
-
End Time: the end time for your crew *Note if using the daily or fixed auto settings, the last day's time will be determined for you
-
Name: The unique recurring series name
-
Repeat: Can be daily daily-auto, weekly, monthly, fixed or daily auto
-
Repeat Every: How Often to repeat (only applicable when selecting daily, weekly, or monthly)
-
End: Can select After to end on a set number of the repeat area, can select on to select a date to end on
-
Skip: can skip Saturday and Sunday if the recurring pattern happens to fall on one of those days
Other than the traditional repeats of daily, weekly, and monthly, there are a few more options:
-
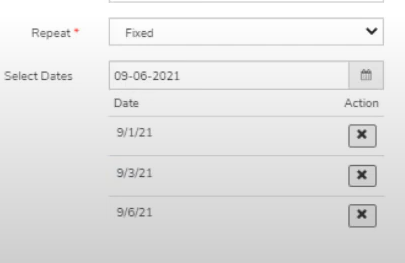
Fixed: you will be responsible for picking the dates by clicking the calendar button to the right of the select dates box *Note your first date has to be your starts on date

-
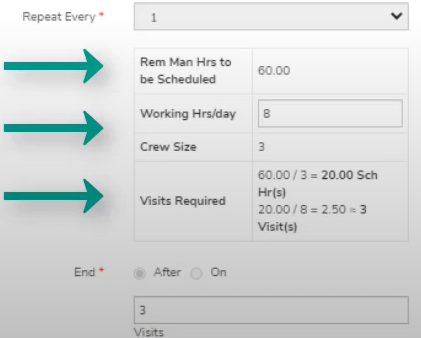
Daily Auto: takes every day and ends the last day accurately according to your crew size and the total estimated hours. You get to select the total working hours a day your crew works and based on the total estimated hours and crew size it will tell you how many visits. In this example it will be 3 total visits but the last day will be a half day

-
Fixed-Auto: works like daily auto except you choose which dates the crew is working on by clicking the calendar icon to the right of select dates.

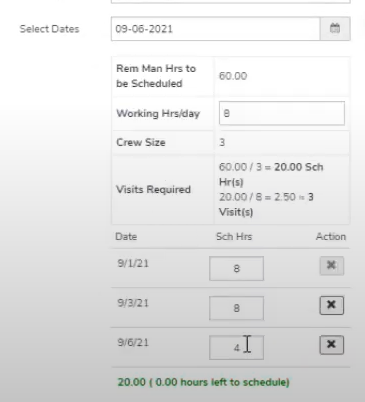
After you establish the dates of scheduling, to the right and top area you will select the visit prices method.

-
Price Each Visit: This will take each visit and put on the service price for each visit. This is not recommended in the tree removal example but in the lawn industry this is more common cause you do a per cut price.
-
Price Evenly: This will take the service price and divide it up among each visit. For example if I am doing a $3500 tree removal for 3 visits and select this option, each visit will be $3500/3 = $1166.66
-
Price $0.00: this option will price all the children visits at 0$ and you will just invoice the parent when the service has been completed for all visits. This is the example we walk through in the top video, its ideal because you can filter for the parent in the batch invoice screen filter setting.
-
Then price by resources: this is an additional option that applies Time and Material to child resources on services so whenever the crew updates that service after they work on it it will update the price of it based on resources (to see how much revenue they earned that day)
You will see a summary on the right side of your choices for the recurring pattern:

You have the ability to save the recurring pattern to use again. (likely it won't be used again if you are tree company due to it being a unique recurring pattern)
Click Schedule Service to schedule the recurring pattern, you will see a summary of each visit(s) at the bottom.
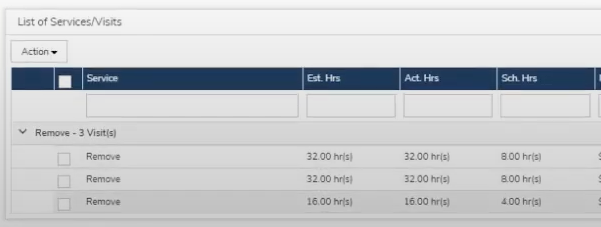
On the right side you will see each recurring series you have made for the service

As long as each visit for the service, is marked completed (either in the cloud or in mobile crew), the parent will be market complete, and you can find that parent in the AR -> Batch Invoice tab on the left if you use the correct filter. Click the filter at the top and select the Show Multi-Day Parents Option. Click filter to see the results.
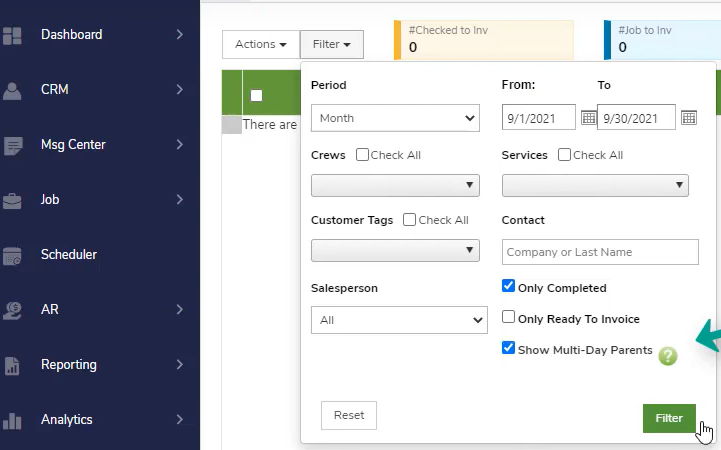

To turn this into an invoice you will check the box to the left of the item, select Action -> Invoice Selected at the top left side.
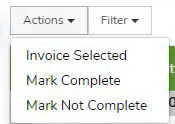
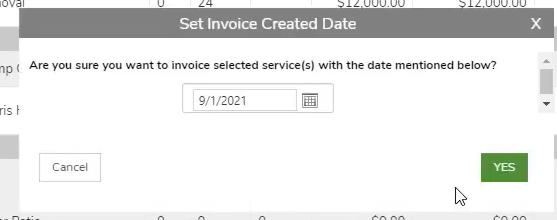
It will ask you if you want to invoice the selected service(s) with the date mentioned through which you can edit the invoice date, and then click YES
 Did this answer your question?
