How to Invoice Individual Services or Jobs in Arborgold
Invoice specific services or jobs in Arborgold quickly and accurately. This guide walks you through each step, from completing work orders to sending invoices with clear instructions and supporting visuals.
Completing the Job
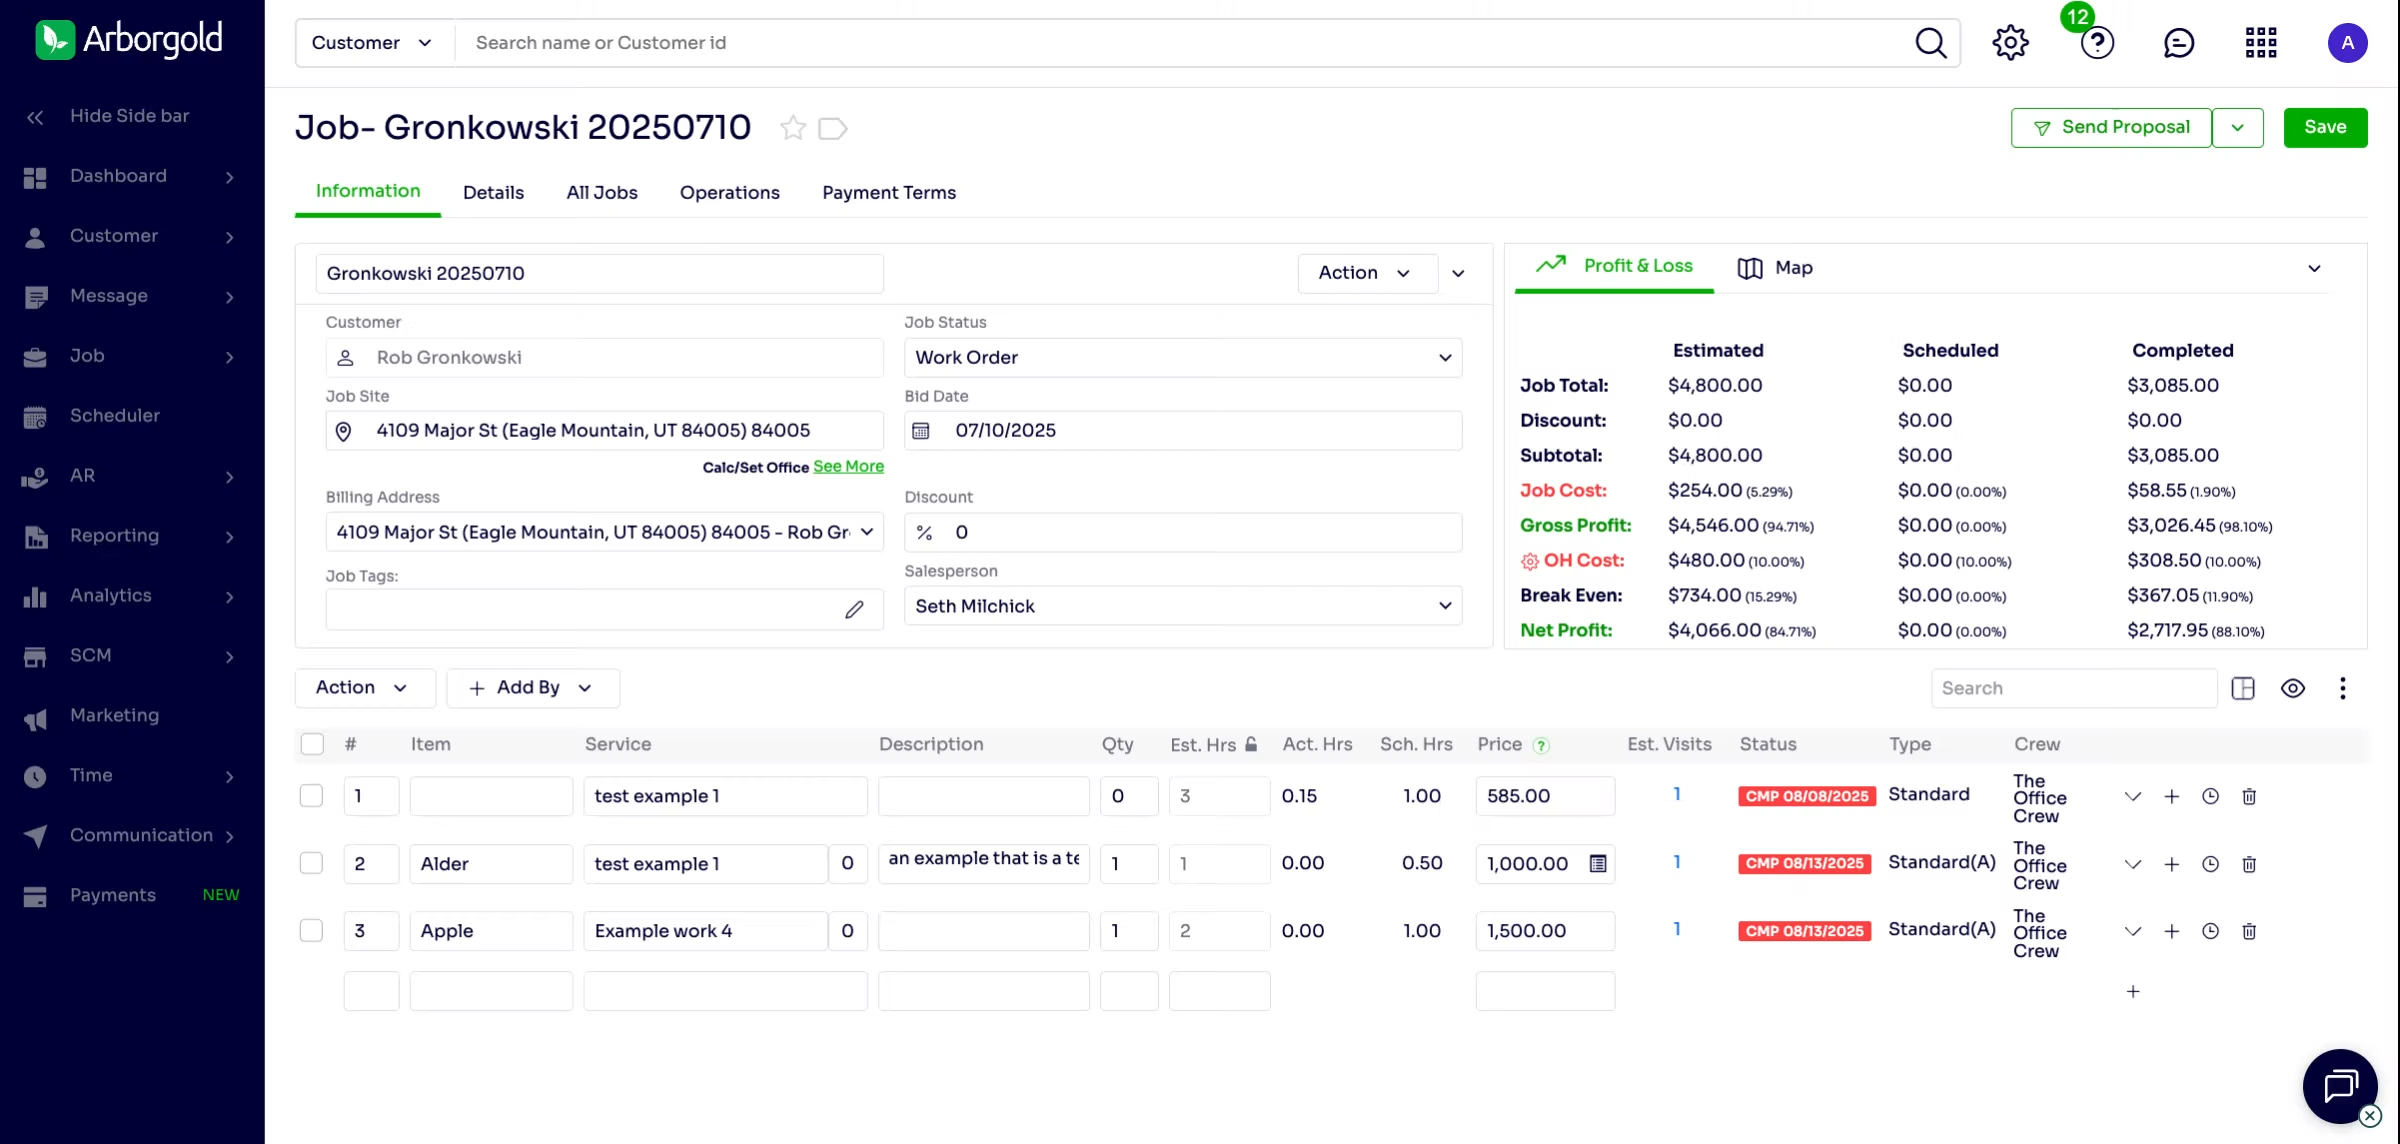
Step 1: Start on the Job Creation Screen
Begin the process on the job creation screen, where all job details are managed.
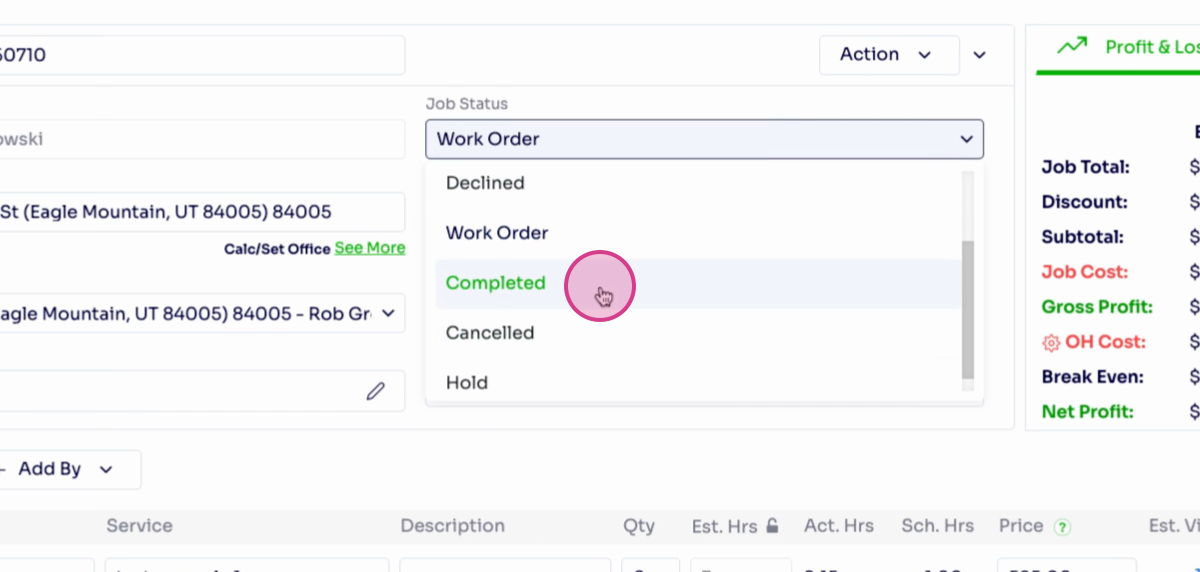
Step 2: Move the Work Order to Completed
Marking the work order as completed finalizes your job and helps with accurate record keeping.
Selecting Services to Invoice
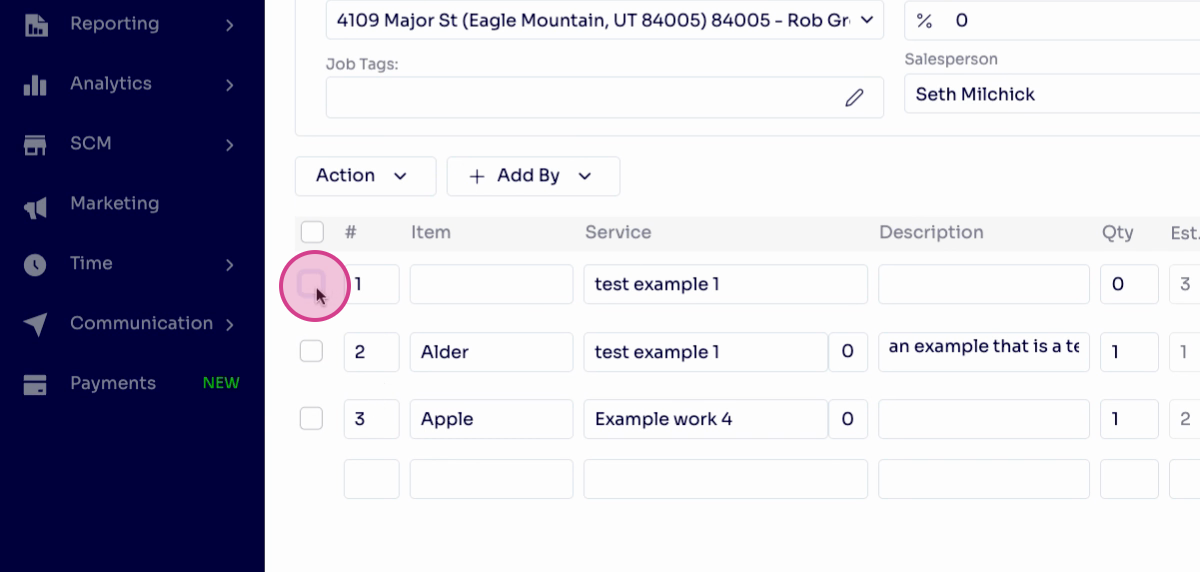
Step 3: Select Services from the Service List
At the bottom left of the job screen, choose the completed services you want to include on the invoice. Carefully review and select each relevant service.
Invoicing the Selected Services
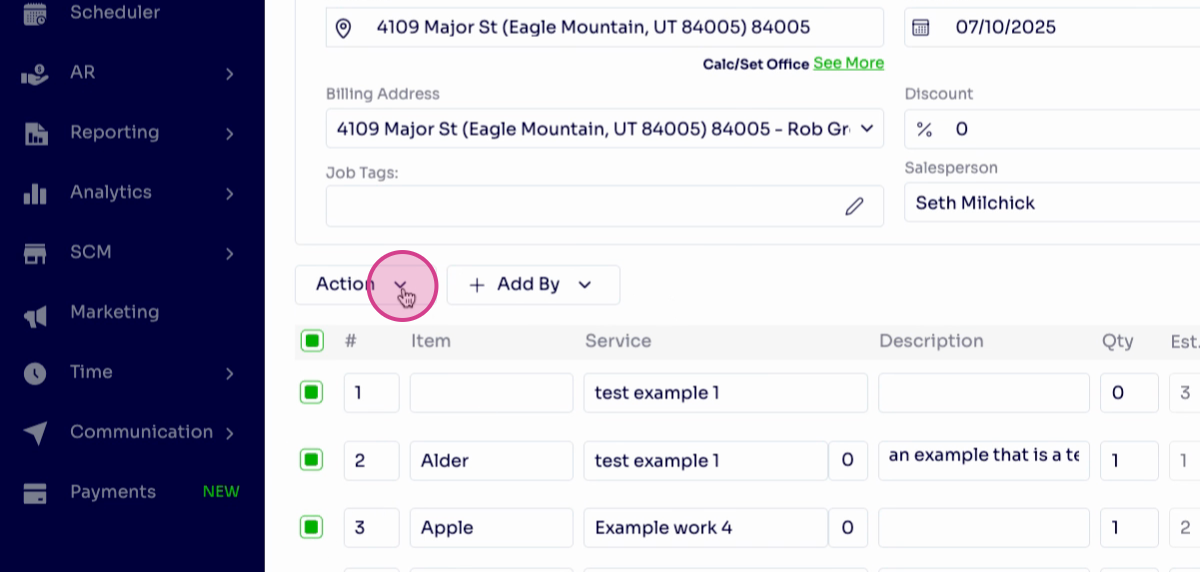
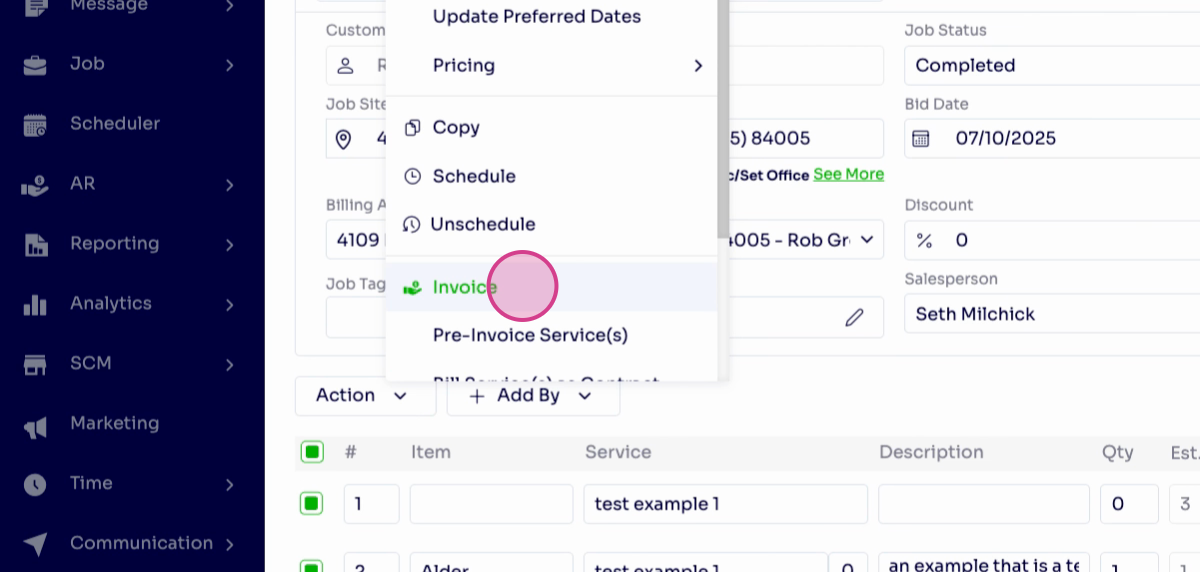
Step 4: Open the Actions Menu
With services selected, click the Actions button in the top left to begin the invoicing process.
Step 5: Choose the Invoice Option
Select the Invoice option, indicated by the money-in-hand icon, to generate your invoice.
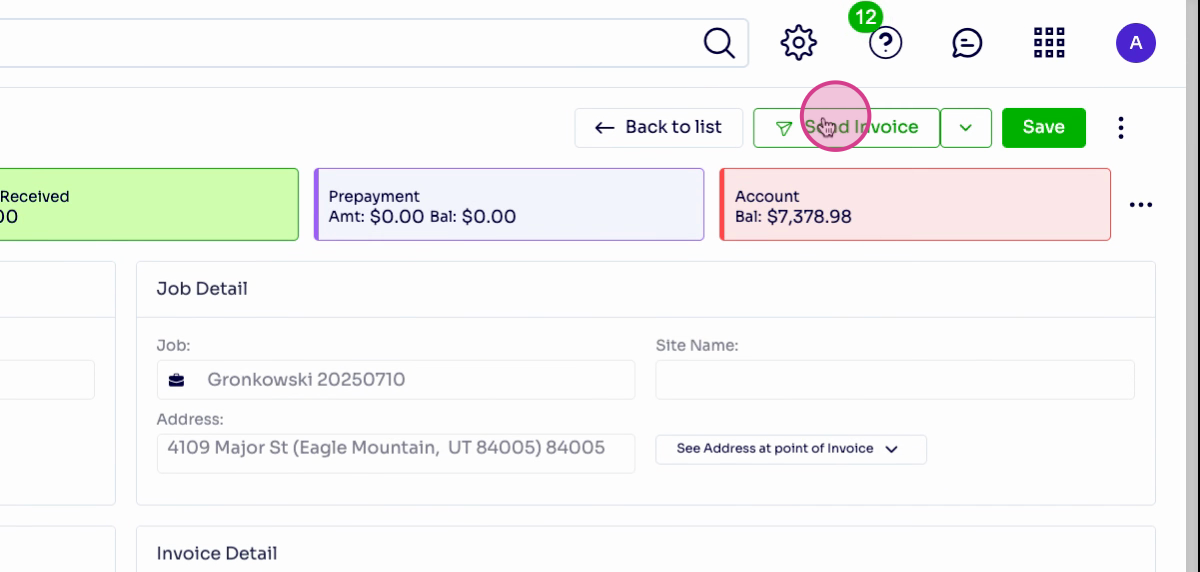
Step 6: Review and Customize the Invoice
The generated invoice will display customer and job details. Here, add a PO number if required, edit services, include notes or tags, and check payment history for this invoice.

Sending the Invoice
Step 7: Open the Send Invoice Window
From your invoice, go to the top right and select Send Invoice to prep your communication.
Step 8: Configure Email Settings (for ArborGold Payments)
Enable Offer E-Invoices at the top left (if using ArborGold payments). Double-check the sender and recipient emails and make sure your email template is ready.
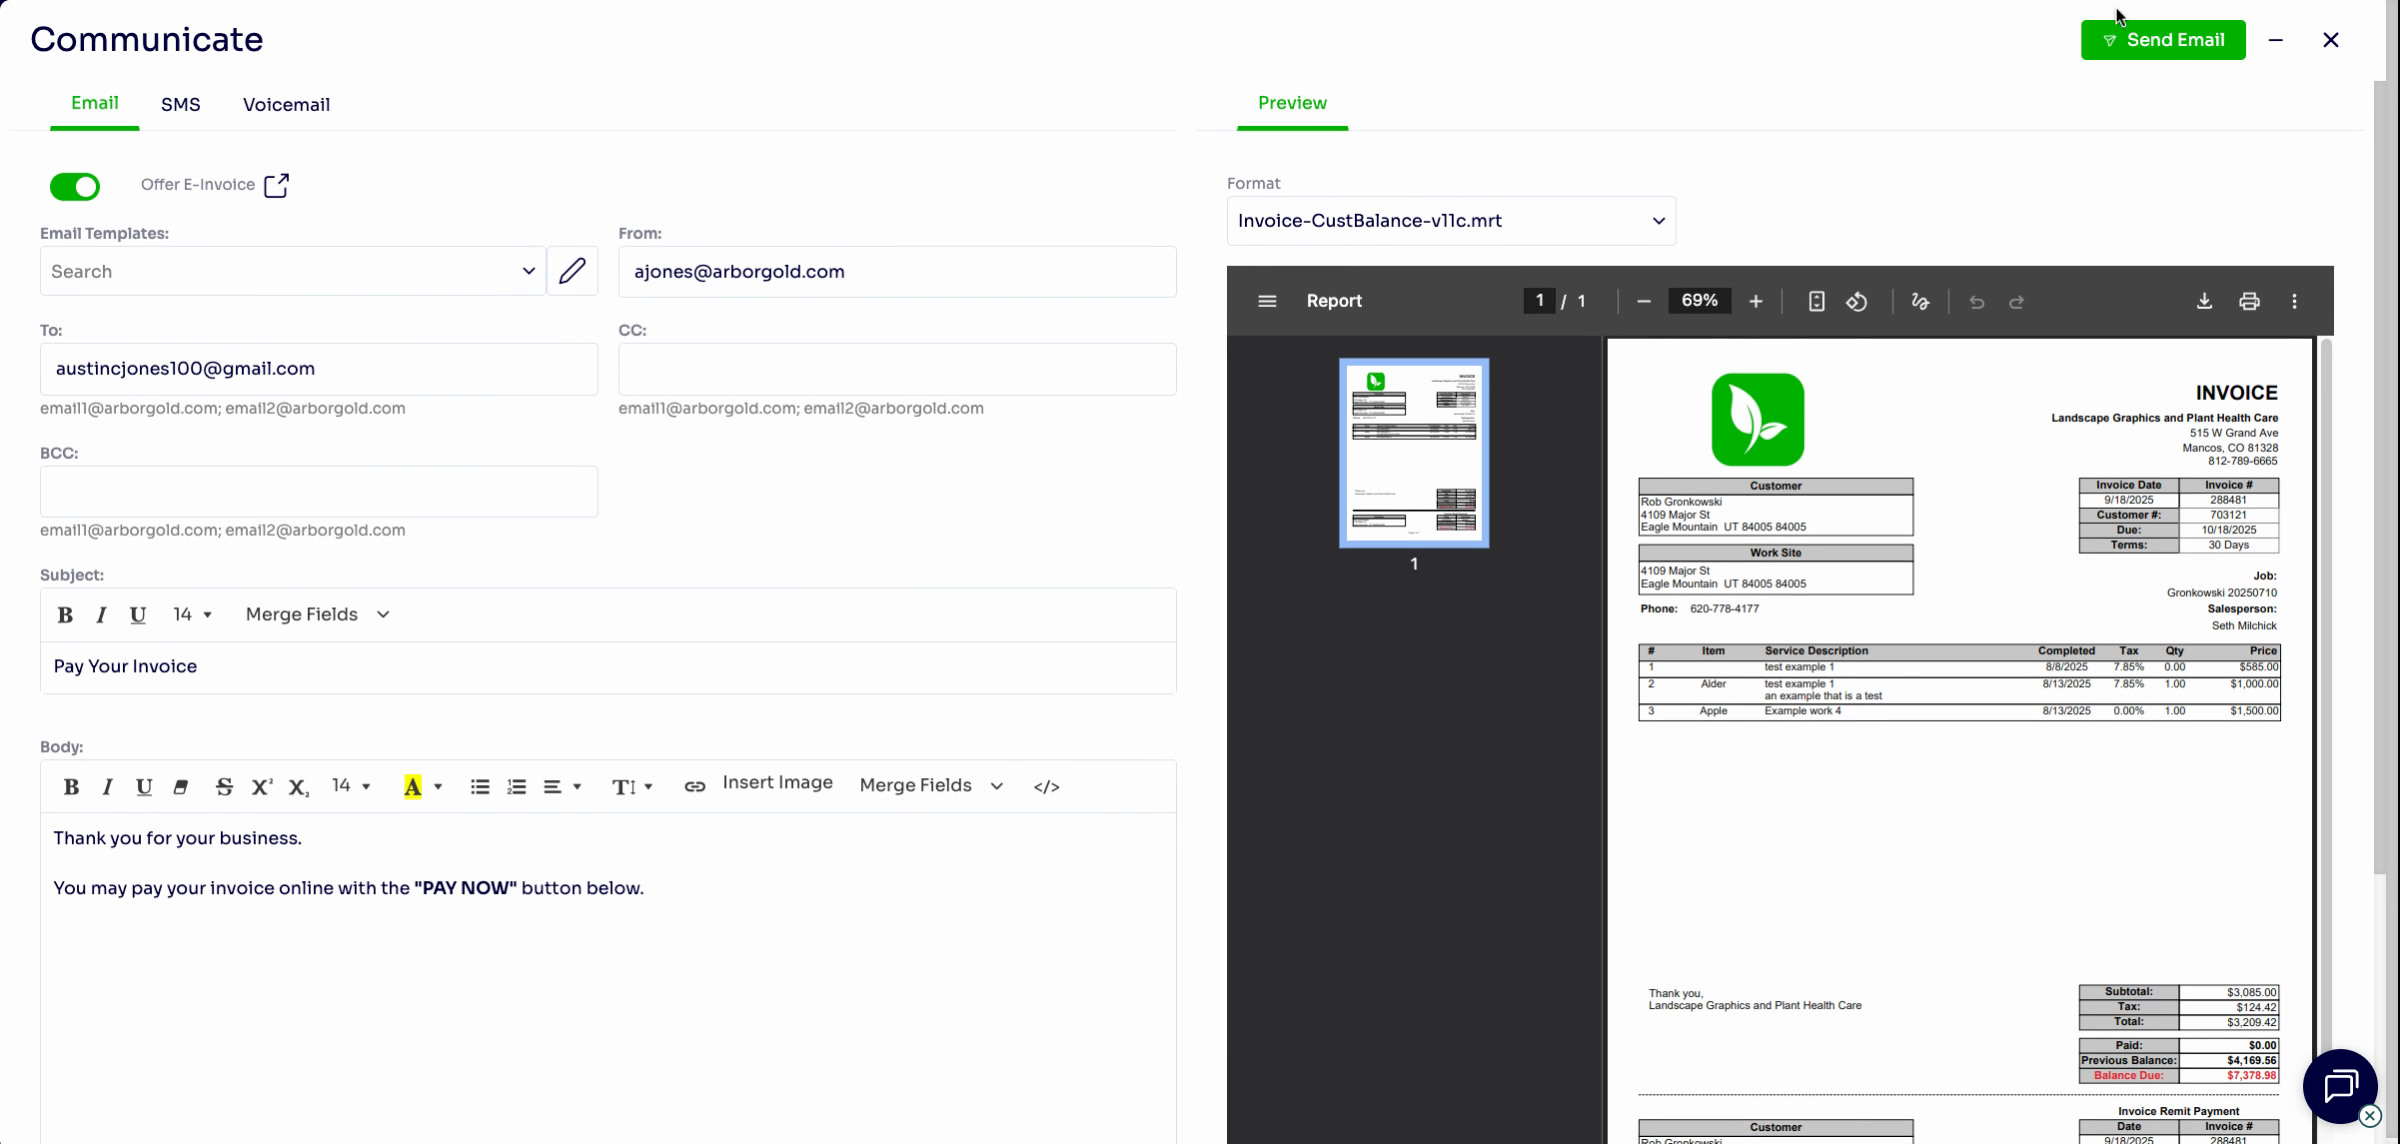
Step 9: Send the Email
When everything is set, click Send Email at the top right to deliver the invoice to your customer.
