Table of Contents
Why This Matters
We built Two-Way Texting to help teams respond faster and stay organized without losing that personal touch. Here’s what you can expect:
-
Real-time conversations: Text customers directly, just like you would from your phone.
-
Everything in one place: View and manage all text threads in the Text Center.
-
Ready-to-use templates: Send consistent, professional messages quickly.
-
Smarter automation: Schedule reminders and updates automatically.
-
Team collaboration: Add coworkers to ongoing threads and manage permissions easily.
Whether you’re confirming appointments, following up on a job, or sharing updates — it’s all streamlined now.
Two-Way Texting Enrollment
Please refer to this Two-Way Texting Enrollment Guide.
Text Settings Overview (best practices for setup)
All texting preferences and automations can be managed under Settings → Text Settings. There are 5 key sections you’ll want to review.
-
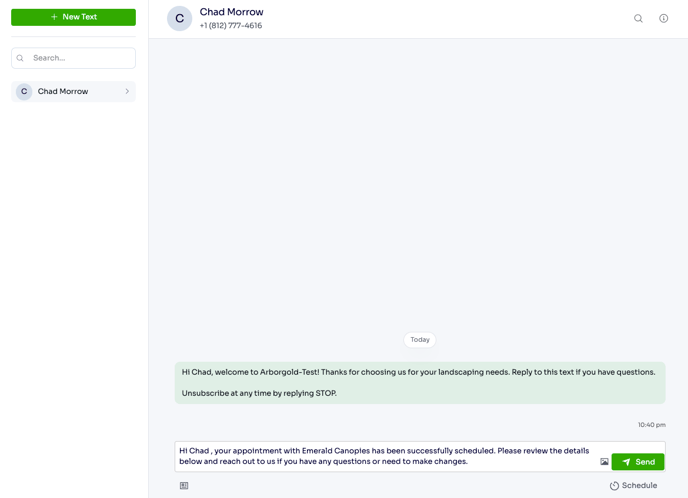
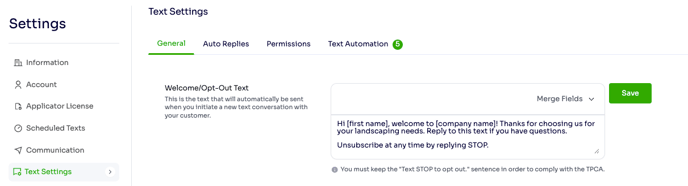
Welcome / Opt-Out Text
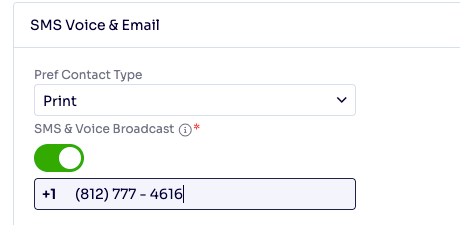
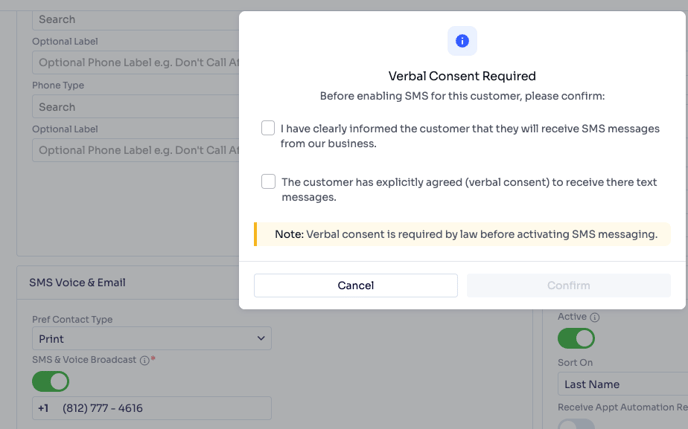
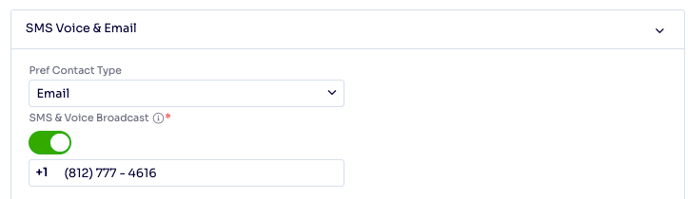
When Two-Way Texting is enabled, Arborgold automatically activates texting for all existing customers who have a phone number saved in the "SMS & Voice Broadcast" field of their profile.
Please note that while existing (legacy) customers are synced automatically, they won’t receive the default welcome message until you send them an initial text.
For new customers, make sure their mobile number is saved in the same "SMS & Voice Broadcast" field. Upon saving, you’ll see an opt-in confirmation screen that must be approved. Once approved, the customer will receive the default welcome message.
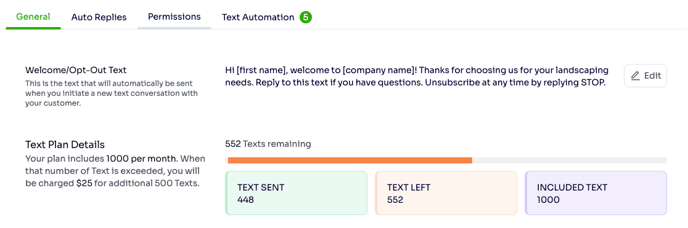
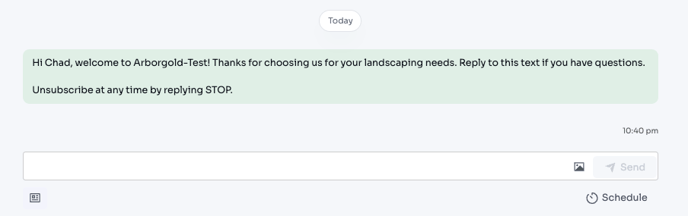
This is the text that will automatically be sent when you initiate a new text conversation with your customer.
Example:
“Hi [First Name], welcome to [Company Name]!
Thanks for choosing us. Reply if you have questions.
Unsubscribe anytime by replying STOP.”
-
Text Plan Details
View your text usage summary:
-
Monthly limit (e.g., 1,000 texts/month)
-
Remaining and sent count
-
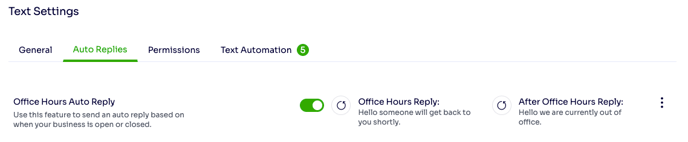
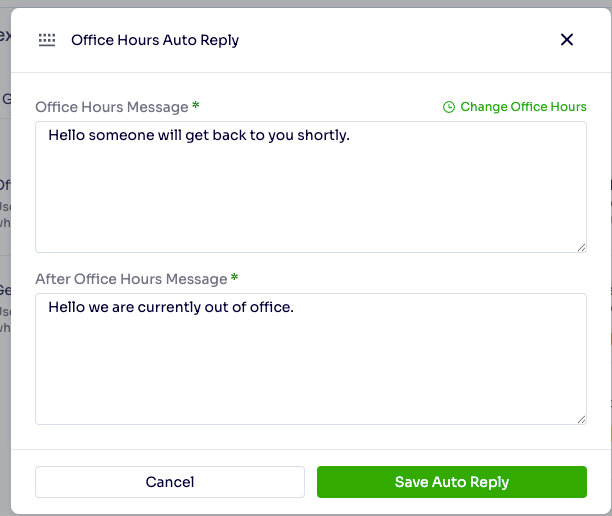
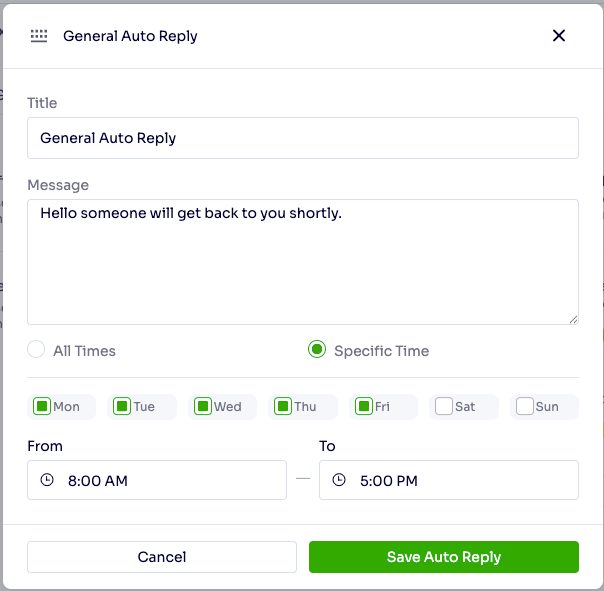
Auto Replies
Use auto-replies to stay responsive when you’re not available.
-
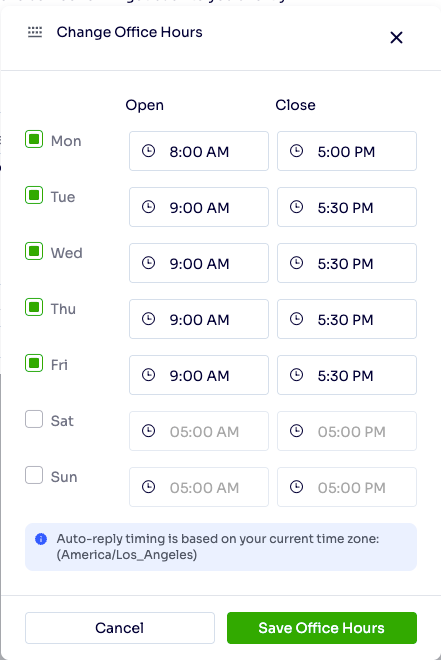
- Office Hours Auto Reply
Send automatic replies based on your open or closed hours.You can update Office Hours Texts and Office Hours.
-
- General Auto Reply
You can Set specific replies by schedule and Edit or Delete at your convenience.
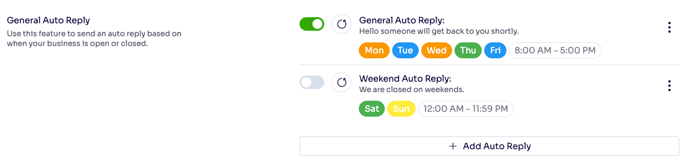
Notes: You can only Enable Office Hours Auto Reply or General Auto Reply at a time.
-
Text Permissions
Define who can view or respond to customer messages to ensure secure, role-based communication.
- Admin role: Full access to all settings and conversations
- Manager role: Can view and reply with moderate access control
- Staff role: Restricted to assigned conversations only
-
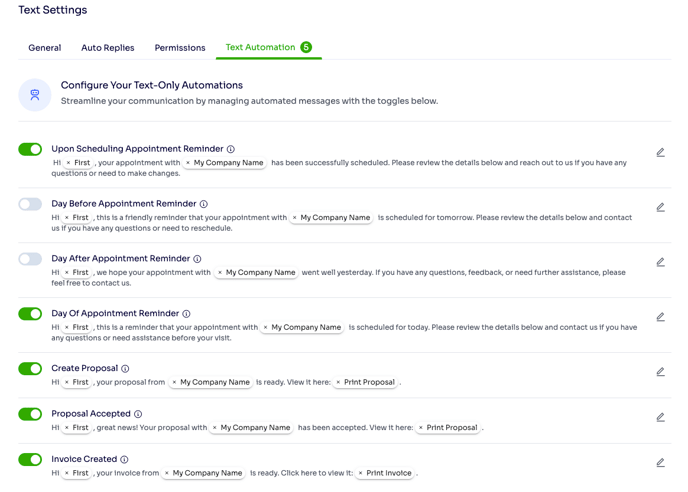
Text Only Automation
Introducing the new Text-Only Automation for all your Sales, Service, and Invoice processes. You no longer need to set up Campaigns or Templates when using Text Automation alone. Existing Appointment and Job Automations will continue to function as before for Email and Text follow-ups. This feature provides a new, streamlined way to automate text communication. The Text Only automations can be managed under Settings → Text Settings.
Let the system handle routine messages automatically — great for appointments or jobs.
-
- Appointment Automations
-
When an appointment is scheduled
-
One day before the appointment
-
On the day of the appointment
-
The day after (for feedback)
-
- Job Automations
-
When a proposal is created
-
When a proposal is accepted
-
When an invoice is created
-
- Appointment Automations
You can update and enable or disable these automation texts at your convenience. They help minimize no-shows and keep your customers informed.
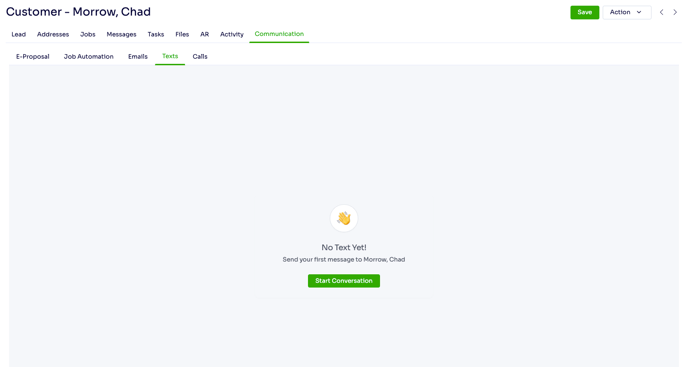
Starting a New Conversation
Starting a text conversation is quick and simple, It can be initiated from Customer Profile and/or Text Center.
- Via Text Tab under Customer Profile
- Go to Customer Profile → Text Tab.
- Click Start Conversation.
- Type your text message or select a saved template.
- Click Send or Schedule for later.
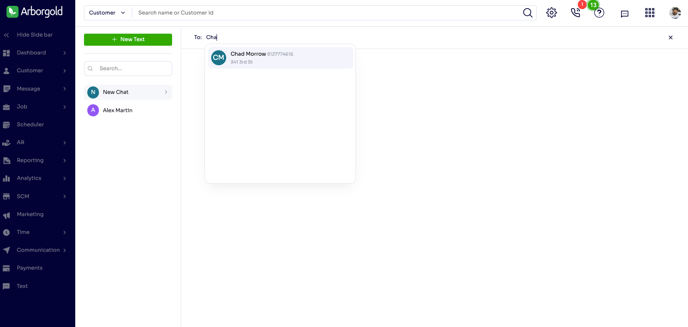
- Via Text Center
- Click on Text option from Left Side Navigation Menu
- Click on New Text
- Search and Select the customer you want to send text to
- Type your text message or select a saved template.
- Click Send or Schedule for later.
💬 Example:
“Hi [First Name], this is [Company Name]. We’ve confirmed your appointment for tomorrow.
Please let us know if you need to reschedule!”
⚙️ Prerequisites
Before sending or receiving texts, make sure:
-
Your Text Plan is active (see Text Settings → General Tab).
-
The customer’s phone number is valid and saved in the customer profile under SMS & Voice Broadcast field.
- The Phone Number should be unique to that customer
-
You or your staff have the correct text permissions.
- You have default Welcome/Opt-Out Text configured under Text Settings.
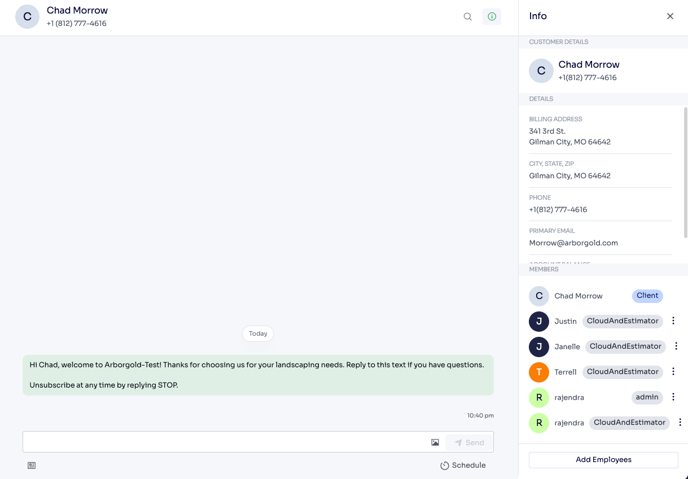
Text Center — Your Messaging Hub
The Text Center is where all text conversations are stored. You can view ongoing, scheduled, and past messages between your team and customers.
Adding Team Members to a Conversation
You can bring teammates into any text thread to keep communication seamless.
Steps:
-
Open the conversation thread in the Text Center.
- Click on Info icon to open Customer Info side panel.
-
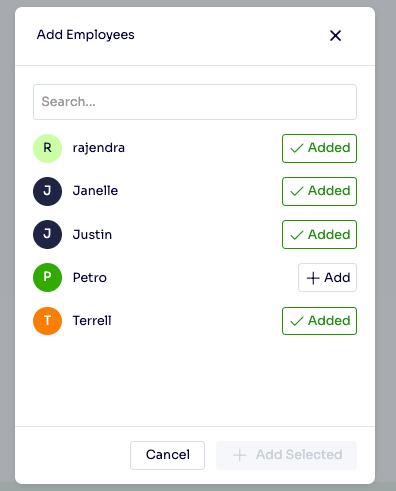
Click Add Employees.
-
Select the employees you want to include.
They’ll be able to reply or manage messages based on their permission level.
Note: By default, all Arborgold users with the roles Cloud & Estimator or Cloud & Crew (Managers), as well as those with admin permissions for these roles (Cloud & Estimator with Admin Permission or Cloud & Crew with Admin Permission), will automatically be included in the text conversation with your Customers.
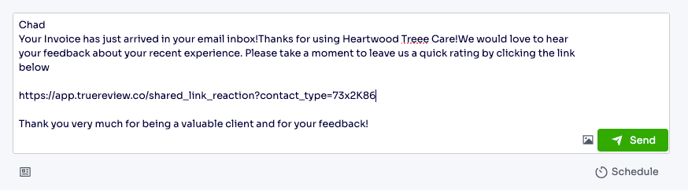
Using Text Message Templates
Save time and maintain consistent messaging with existing sms templates. Text Templates can be used for common scenarios like reminders, thank-you, or job updates.
How to use:
-
Open Text/Chat screen.
-
Click Templates button on bottom left.
-
Click on Use template to select one
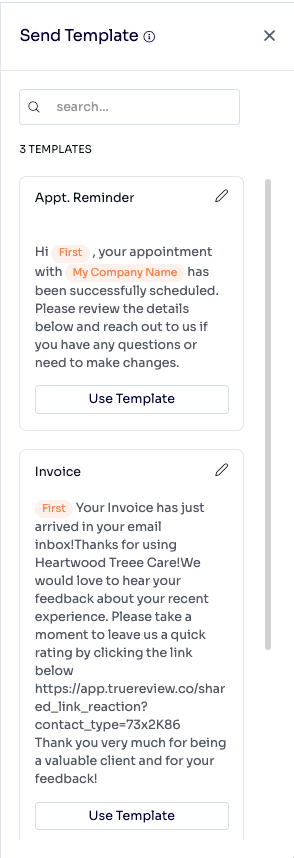
- Click Send button
Note: The Text screen does not display SMS templates containing any of the following merge fields: [E-Invoice Button], [E-Proposal Button], [End Time], [Job Name], [Notes], [Print Invoice], [Print Proposal], [Service Name & Description], [Service Name & Time], [Service Name No Item#], or [Service Name, Time & Description]. Templates using other merge fields will appear on the Text screen.
Sending Images
Include photos for better customer clarity. You can now directly attach and send images from your system as Text message with one click.
-
Click the Image icon

-
Upload a photo
-
Add a short message if needed
-
Hit Send
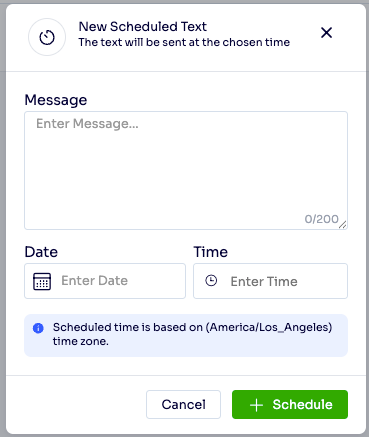
Scheduling Texts
You can plan to send text messages in advance with the Scheduled Texts feature.
To schedule a text message:
-
Click on Schedule.

-
Enter your Message (up to 200 characters).
-
Choose the Date and Time.
-
Click Schedule.
You can access the Scheduled Texts screen from Settings → Scheduled Texts.
This section allows you to view, create, and manage all your scheduled messages in one place.
- Scheduled Tab
-
Displays all upcoming scheduled texts.
-
Use the Create a Scheduled Text button to schedule a new message.
-
When creating a scheduled text, simply select a Customer, compose your message, and choose a future date and time for delivery.
-
You can also cancel any scheduled message before it’s sent using the Cancel Scheduled Text button.
-
- History Tab
-
Lists all texts that have been successfully sent or cancelled.
-
Helps you track past communications for reference or auditing.
-

🌟 Best Practices for Texting
✅ Keep texts under 200 characters.
✅ Always include your company name and opt-out instructions.
✅ Use templates for consistency and speed.
✅ Schedule reminders to improve response rates.
✅ Monitor your Text Plan Details regularly.
🚀 In Summary
The new Two-Way Texting feature gives your business a faster, more professional way to communicate — directly from your dashboard.
From automated reminders to real-time chat, everything is now unified, trackable, and easy to manage.
Start connecting with your customers today — and experience how simple, smart texting can elevate your service and efficiency.