- Help and Support Center
- Work Scheduler
- Scheduling Settings & Interface
-
Quick Start Tutorials
-
Arborgold Updates
- Arborgold Insider - Monthly Updates
- Arborgold Crew Releases
- Arborgold Major Feature Additions
- Arborgold Monthly Improvements 2025
- Arborgold Monthly Improvements 2023-24
- 8.1 Release Documentation
- 8.0 Release Documentation
- 7.14 Release Documentation
- 7.12 Release Documentation
- 7.11 Release Documentation
- 7.10 Release Documentation
- 7.9 Release Documentation
- 7.8 Release Documentation
- 7.7 Release Documentation
-
Industry Use Cases
-
Webinars
-
Integrations
-
Company & User Settings and Lists
-
Services, Pricing, & Resources
-
Customers (CRM)
-
Jobs Management & Mobile Estimator
-
Work Scheduler
-
Arborgold Crew
-
Accounts Receivables
-
Payroll Tracking and Job Costing
-
Supply Chain Management & Accounts Payable
-
Communication and Renewals
-
Reports and Analytics
Customizing Columns in the Work Scheduler
How to add more columns in the Work Scheduler
Customizing Columns in the Scheduler Learn how to customize the columns you see in the work scheduler.

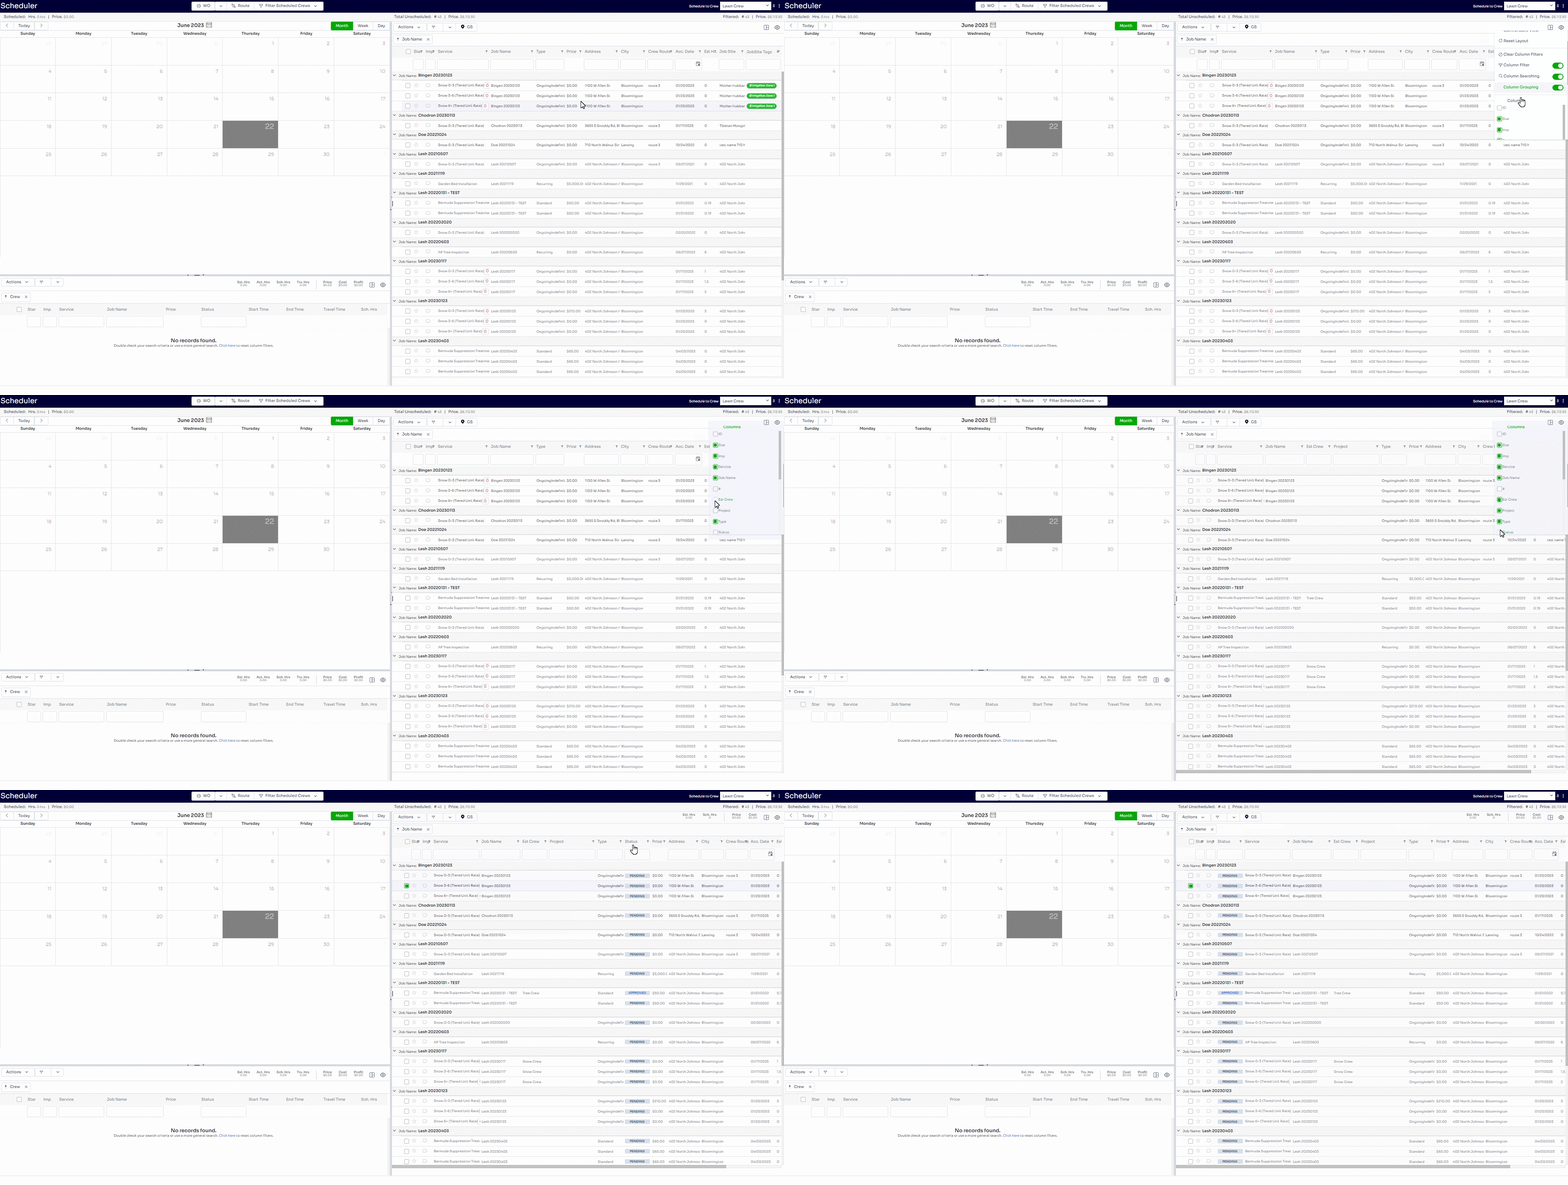
In order to customize your columns, you will need to go into the Work Scheduler, and click on the small button in the upper right hand corner of the page (for unscheduled services (1) ) or the upper right hand corner of the scheduled service listing (for scheduled services (2)).

You can choose what columns display by checking the boxes to the left of each option, or unchecking them to have the column no longer display.
The columns available to add and remove on the work scheduler include:
-
ID
- Star
- Imp
- Status
- Service
-
Job Name
-
#
-
Estimated Crew (Est Crew)
-
Project
-
Type
-
Status
-
Price
-
Address
-
City
- Crew Route
-
Accepted Date (Acc. Date)
-
Estimated Visits (Est Visits)
-
Last Visit (Days)
-
Predecessor Days (Pred (Days))
-
Item
-
Distance (Dist)
-
Estimated Hours (Est Hrs)
-
Cost
-
Overhead Cost (OH Cost)
-
Break Even (BE)
-
Profit
-
Quantity (Qty)
-
Zip
-
State
-
Latitude (Lat)
-
Longitude (Long)
-
Map Code
-
Job Site
-
Skip
-
Skipped Date
-
Call Ahead
-
Invoice Balance (Inv Bal)
-
Hold Date
-
Preferred Job Start (Pref. Job Start)
-
Customer Tags (Cust Tags)
-
Job Site Tags
-
Service Tags
-
Job Tags
-
Customer Type (Cust Type)
-
Salesperson
-
Preferred Service Start (Pref. Service Start)
-
Preferred Service End (Pref. Service End)
-
Phenology Week
- Bid Date
