Create a Service Tag
You can create a service tag by opening any job information page in your database (Note: this does not have to be the job you want to add the program to), clicking on the '+' button next to any service, scrolling down to the Service Tags drop down and selecting the diagonal pencil icon to the right.

This will bring up the Service Tags pop up, where you can edit a service tag by clicking on the diagonal pencil icon to the right of the service tag, or add a new tag to your database by clicking on the '+ Add' button in the upper right hand corner of the pop up.
Clicking on the '+ Add' button will create an empty tag space where you can type in the name of your new tag, and then select the check box to the right to save it to your list.
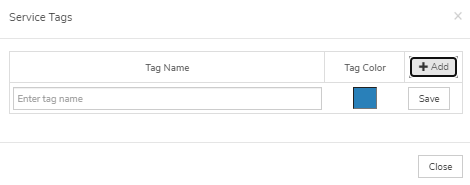
Note: You can also delete a service tag from your database by clicking on the trash can icon to the right of the service tag, but this will pull that tag off of every service in your database, so you will want to be careful when making your selection.
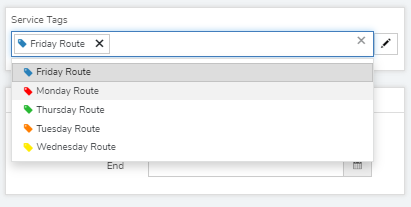
Add a Service Tag to the Service
To add the service tag to to the service, you will want to be on the job information page of the service you would like to add the tag to, click on the '+' button next to any service, scroll down to the Service Tags drop down and select your tags of choice. This will drop them into the Service Tag section, allowing you to exit the Service Tags pop up, exit the Service Details pop up, and click on the orange Save button in the upper right hand corner.